Explore the Detector module in food inspection
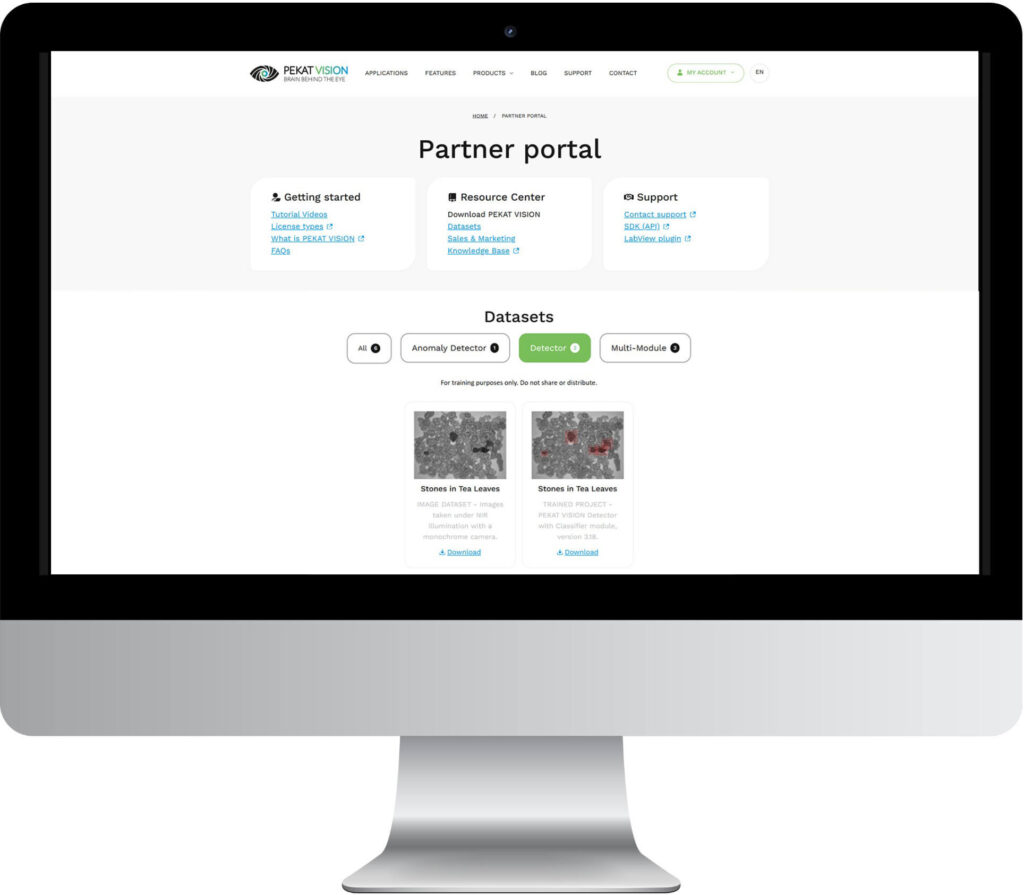
In one of our recent studies, we explored food inspection using NIR (near-infrared) illumination and a standard Datalogic monochrome camera. One key characteristic of NIR light is its ability to enhance contrast between different materials—a property we leveraged to differentiate between stones and tea leaves. In this post, we’ll take a closer look at how the PEKAT VISION Detector module was used.
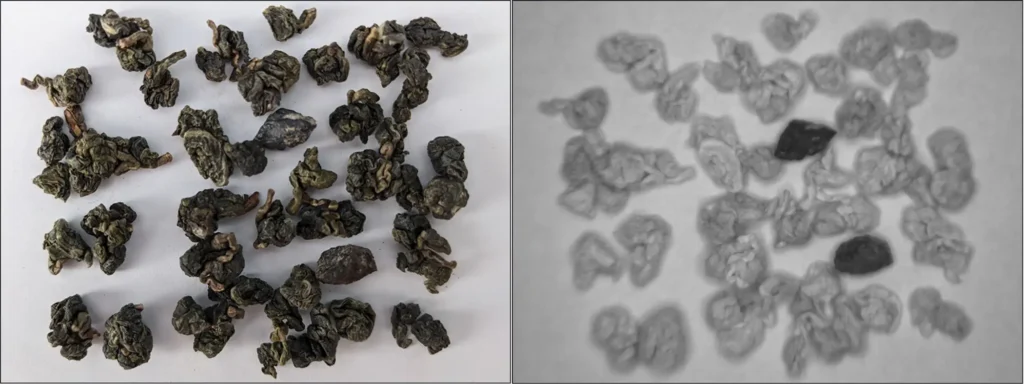
Detector Module: With or Without Classification?
When using the Detector module, you have two options—deploying it with or without classification. If you’re looking for a single type of object (such as stones in our case), the Detector module alone is sufficient. However, if you’re identifying multiple object types and need to distinguish between them, you can enable the „Classify“ feature. This allows you not only to detect objects but also to determine which ones they are—useful if you need to set evaluation criteria based on their numbers.
For example, in our Quality Inspection of Chocolate Boxes study, each box was required to contain 16 different pieces of chocolate, one of each kind. Any deviation from this standard—whether a missing or duplicate piece—was flagged as faulty. 16 unique classes were required for this project.
Setting Up the Detector Module for Stones in Tea Leaves
For our next example, we’ll use the Detector module with just one class—“Stone“—for clarity. Otherwise, detected objects would default to „Defect,“ and we wouldn’t be able to choose the color of the detection rectangle. Setting up and training the module is straightforward—you can follow along using our downloadable dataset.
Preparation
- Download the image dataset from our Partner Portal and unzip it (file name: partner-portal-IMAGES-Stones.in.Loose.Tea.Leaves).
- Launch the PEKAT VISION application.
Create a New Project
- Click Create New Project.
- Enter a project name, e.g., Stones in Loose Tea Leaves, then click CREATE and START.
Create Tags (Optional but Recommended)
Adding tags makes it easier to sort, verify accuracy, and visually identify OK/NG images.
- Click the OPEN TAGS icon in the upper menu.
- Click + ADD TAG, choose green, and rename it OK.
- Click + ADD TAG again, keep red, and rename it NG.
- Click SAVE.
Upload and Tag Images
- Click ADD IMAGES, locate the unzipped folder, filter for NG, select all images, and click Open.
- Click NG + to tag all the uploaded images, then click SUBMIT.
- Repeat for OK images.
Open the Detector Module
- In the left menu, click Modules, then EDIT.
- Click +, select Detector, then click ADD.
- Click SAVE CHANGES.
- Click Detector from the menu tree to open its settings.
Annotate the Images
- Filter NG images or scroll to find the first one.
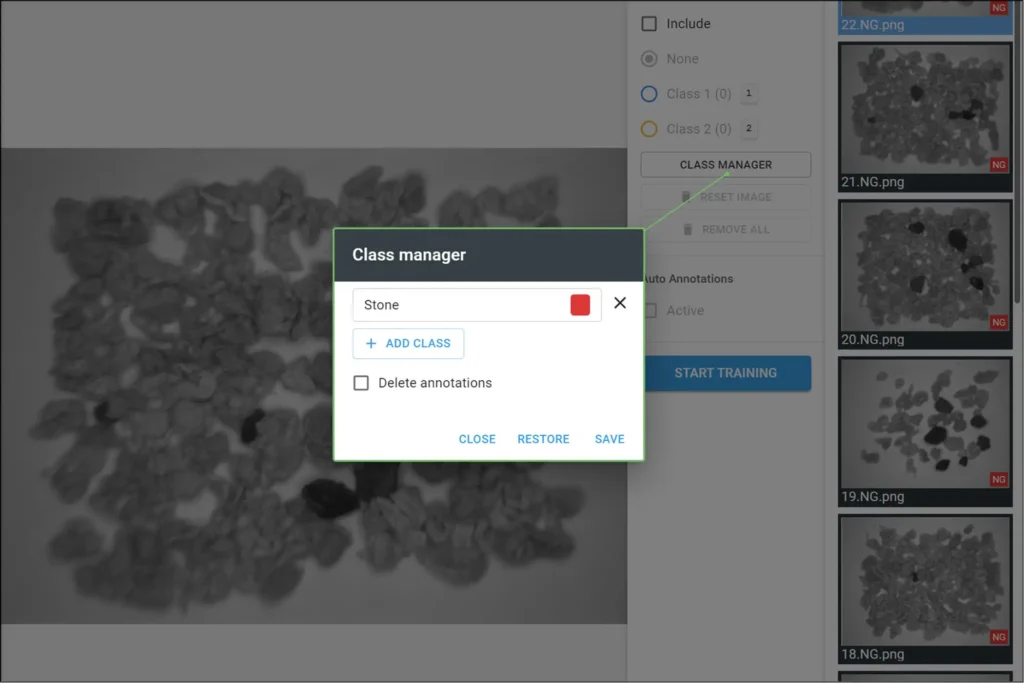
- Check Classify in the upper right menu. Click CLASS MANAGER, rename Class 1 to Stones, select red, and delete Class 2. Click SAVE.
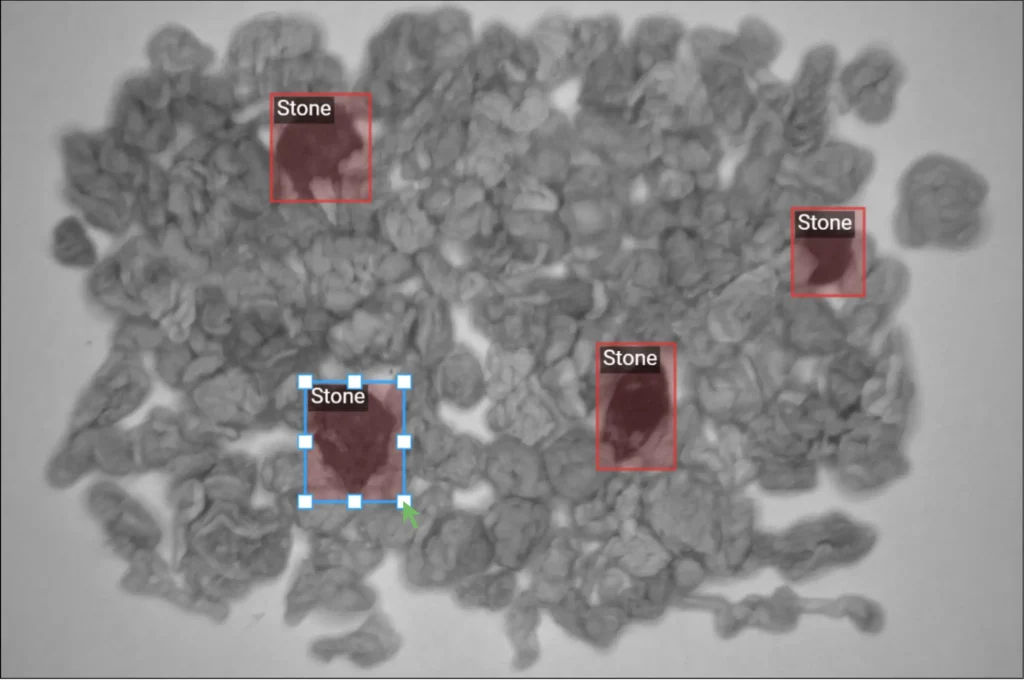
- Draw a rectangle around each stone and assign it to the Stone class.
- Annotate several images—starting with 8–10 is a good approach.
Train the Model
- Click START TRAINING.
- Set the percentage of annotated defects used for training/testing (default: 80% training, 20% testing).
- Click START TRAINING again.
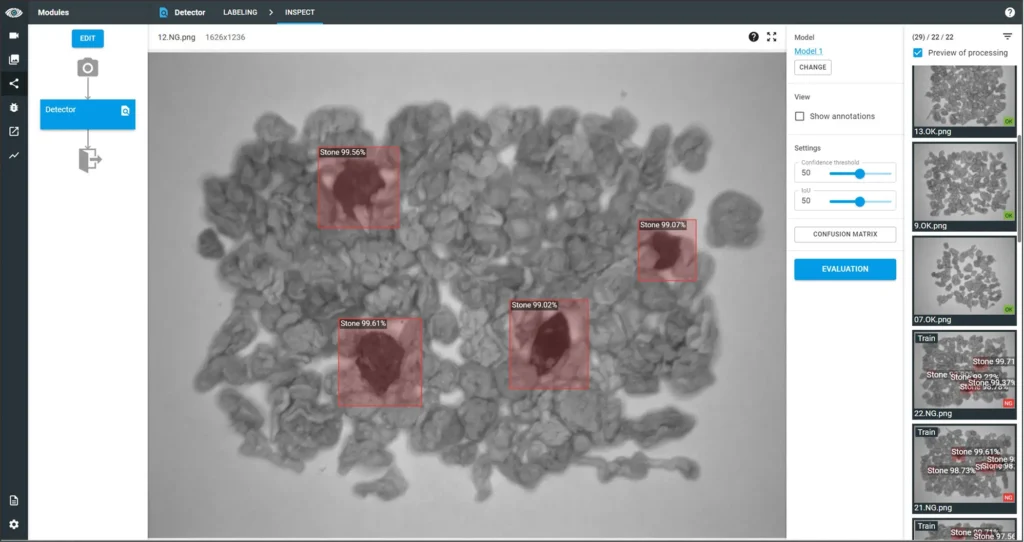
Check the Results
Click CONFUSION MATRIX. If accuracy isn’t 100%, return to the Labeling tab to add more annotations and retrain the model.
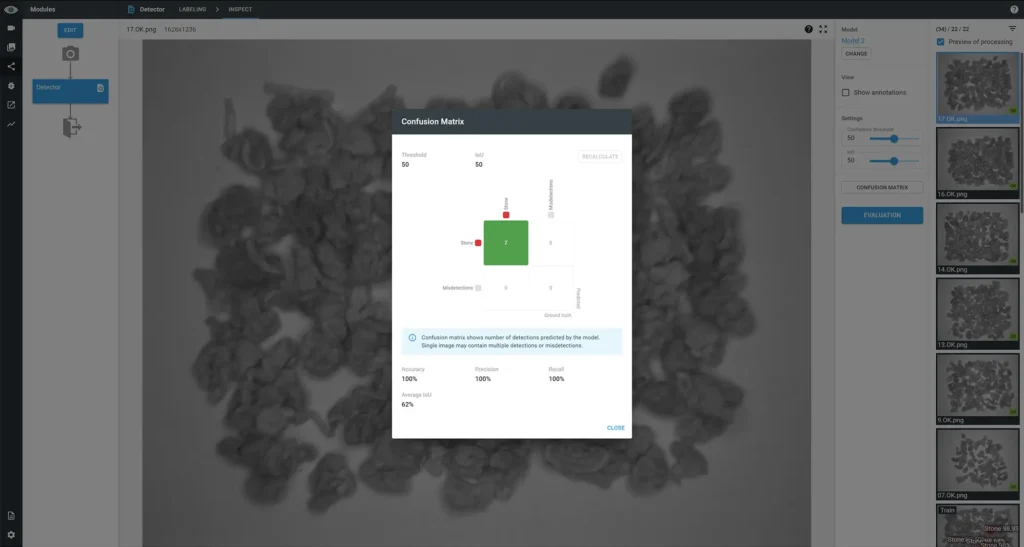
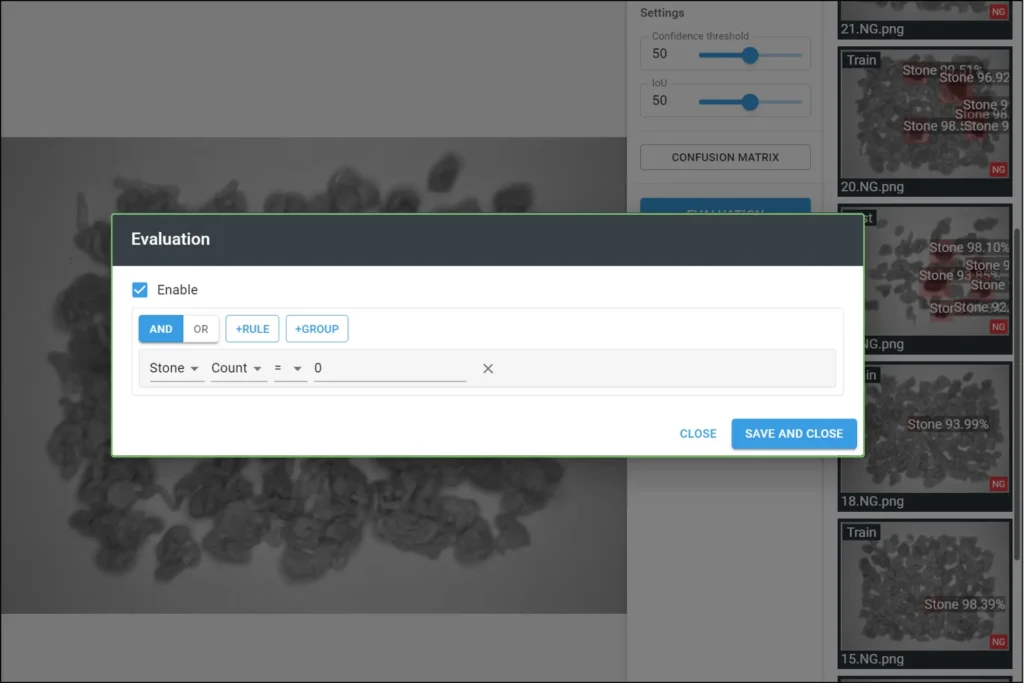
Set Evaluation Criteria
- Click EVALUATION.
- Click +RULE.
- Set the rule: Stone → Count → = → 0 (if no stones are detected, the image is OK; otherwise, NG).
- A green or red stripe will appear over each image for easy validation.
Get a Cup of Tea
Congratulations! You’re done. Take a well-deserved tea break (maybe with a doughnut?). Or, if you’re up for more, read on for additional model setup nuances.
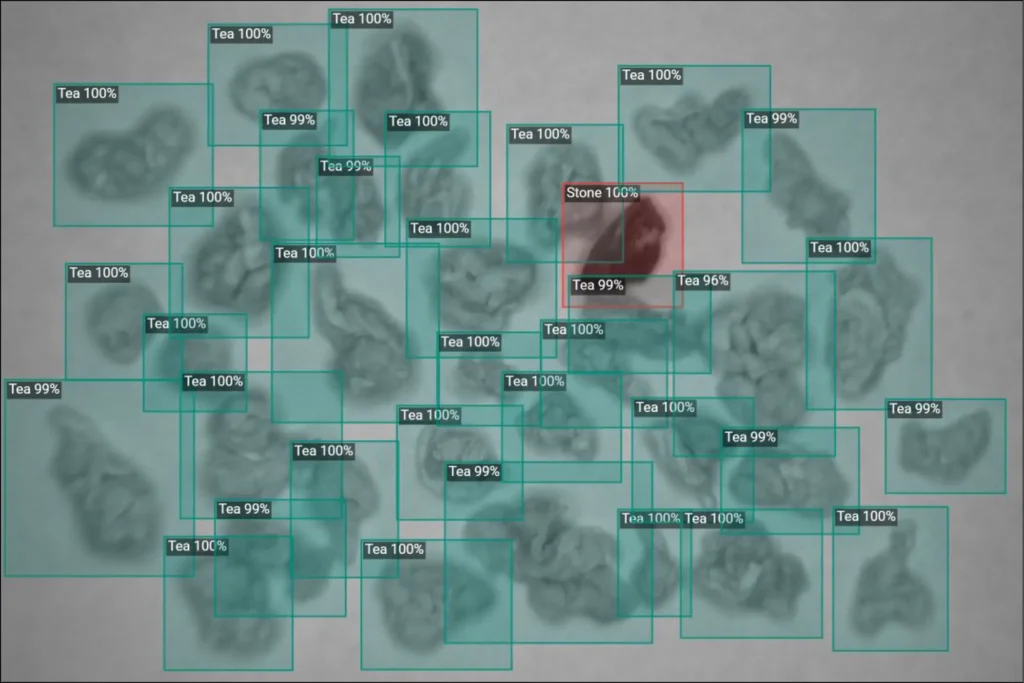
For a simpler setup, you could skip tagging and classification entirely—the model would still detect stones. On the other hand, if you wanted to overcomplicate things (just for fun), you could annotate individual tea leaves, though that’s unnecessary for this case.
Other Examples of Food Inspection
We’ve explored multiple food inspection use cases with PEKAT VISION:
- Rice Cakes Inspection: The Detector module was trained with only two classes—OK and NG. NG covered all possible defects, from breakage to burn marks.
- Salmon Inspection: The Surface Detection module was used to identify defects with precise shape and location data.
- Meat Packaging Inspection: The Anomaly Detector module was ideal for identifying unknown contaminants or irregularities.
For a comparison between the Detector and Anomaly Detector modules, check out our Chocolate Packaging Inspection post.
Not Sure Which Module to Use?
If you’re unsure which module—or combination—is best for your application, send us sample images! We’ll conduct a free feasibility study to determine the optimal solution.
Want to test PEKAT VISION yourself? Explore our demo options and download our datasets & trained models.
Not a customer yet? Register here for full access to our Partner Portal.
